Followers

Click on photos to enlarge.

Saturday, September 29, 2012

Think Pink

No, not for The Cure (that happens in October with all the wonderful pink-themed challenges coming up on SCS), but pink flamingos!  Do you like flamingos?  I do, but never more so than lately.  Never thought to have one in my yard as I don't really do yard "art" for the most part.  (Can those ubiquitous birds even BE considered art?)  I joked to my DD about having one in my yard a few months ago and her reaction made me laugh - she was genuinely horrified and wanted to make sure I was kidding.  I strung her along and said no, I'm NOT kidding (though I really was), and before long we were noticing flamingos and laughing about how they should be in my yard, and thus the idea was born.  I had to have one.  Not just ANY old plastic bird, no ma'am, it had to be unique.  And pretty.  I then joked to my mother who is a published mosaic artist that I hoped she would make one for me for Christmas, birthday, what have you, and after SHE nearly fell over in shock, she jumped on the project with gusto.  

Now mind you, I was thinking small.  You know, a small little thing to tuck into a flower border as one would do a garden gnome or something of that nature.  But if you knew my mother, you'd know she never does ANYTHING small.  Small?  What's that?  Small schmall.  So she started work and before I knew it, small became large, and thus Fannie Flamingo was "born." 

Isn't she lovely?


She's about 4 ft. tall, maybe a little more, and my neighbors LOVE her.  I live on a corner lot and Fannie sees a lot of traffic throughout the day.  I need to plant some fluffy plants around her base to anchor her in the border a little more.

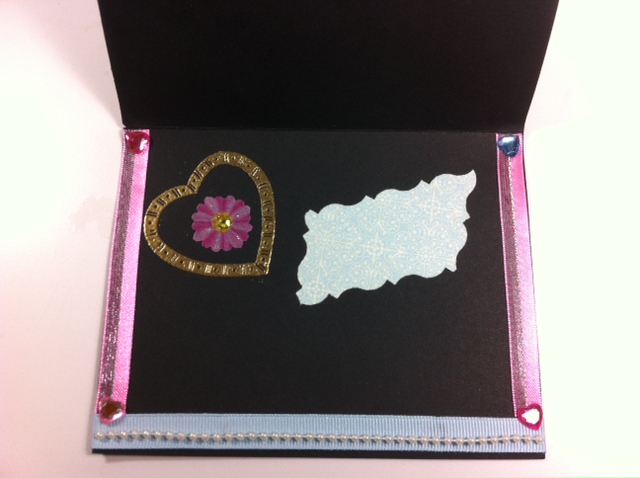
Which brings me to today's card which I made to fulfill a couple of challenges earlier this week.  I had played around with the Smackin' Acetate background technique a couple of weeks ago, and one in particular struck me as being perfect for a "Fannie" card.  I stamped the image with Staz-On ink and gussied the card up with ribbon, roses and a bow.  The roses are made with SU DSP Subtles Stack and the leaves and pine branches are MS punches.  I added a couple of pearls and voila, a "Fannie card!"


Thanks for looking and have a lovely day.  Happy crafting!!

Friday, September 28, 2012

It's Friday!

I love Fridays.

Even though I've been retired for a year, I still love Fridays.  There's just something special about Fridays.  It's funny, because nowadays I get all my errands and running around done during the week when there's less auto and foot traffic and I do my best to stay home on the weekends, but still, there's just something about Fridays that makes the weekend look extra special.  Today, my DD is coming over for a full day of crafting.  Right now we're working on our mosaic projects in which we use vintage or vintage-look jewelry and miscellaneous other items, i.e. game pieces, charms, etc.  Here's a sample, one of my earliest pieces.  


This was the second piece I did.  You can see I used glitter as my grout material.  My subsequent projects have more pieces on them so I don't need to grout.  I'll share them in future posts.  It's a very fun break from making cards.

Speaking of cards, here's one I made yesterday for a challenge on Mark's Finest Papers.  The challenge was to press plant material between two pieces of CS and run it through your die-cutting machine.  I did, and here is my result:


For the stand up base, I used Nestabilities Decorative Labels Eight on top of Labels Eight.  For the flowers, I used a morning glory, a petunia (which is a little hidden by the bow), some blue plumbago florets, a rose petal and some vinca leaves.  I had to enhance the color of the leaves a little bit with chalk as they left no pigment whatsoever, just the imprint of their veins; however, all of the flowers stained the paper very well.  In fact, the morning glory melded with the paper so much that I couldn't remove quite all of its petals.  The "messy" bow is made with seam binding that I dyed to match with SU Concord Crush reinker.  I think I made it a tad too messy - must hold back next time.  I do love messy bows made from seam binding...

I colored the white hatpin pearls with a purple Copic.  Finished it off with a greeting and a few tiny pearls.

TFL and have a lovely day.  Happy crafting!

Thursday, September 27, 2012

It's Fall!

Actually, Autumn officially began a few days ago, but our temps are finally starting to cool off a bit (only going to be 91 today!), so I'm celebrating with a fall-themed card.  This fulfills two challenges: Splitcoaststampers Sketch Challenge and Flourishes Timeless Tuesday .  I love sketches like this - they give lots of opportunities to put "stuff" on the card, i.e. layers, embellishments, etc., and I do love me some stuff:

sc404_tbu-jpg

And then my card:


I used Flourishes Color Made Easy Rich Browns for the base layer and BoBunny Apple Cider and Serenade Collections.  The leaves are from the SU Gently Falling stamp set and the outline stamps were stamped on dp then fussy cut and popped up on dimensionals.  The music, which I distressed with Soft Suede, is from my very first music lesson book dating back to 1969 when I took piano lessons.  I was 10 years old and this book has been traveling around with me all these years to finally land in my garage for the last 12, so I figured it could start being useful again.  Memories...  :)

Finished things off with a couple of SU Vintage Trinkets (the brads), a SU Antique Brad and some hemp twine, and there you are - a fall card!  Hope you like it!

Now I have to go put the master bath and bedroom back together after having the shower re-tiled over the past few days.  

Have a wonderful day and happy crafting!!


Tuesday, September 25, 2012

Sad Day

Hello.

Today is a sad day.  I was forced to have one of my favorite trees in my backyard cut down due to the toll last year's record-breaking heat wave and drought inflicted on it.  I gave it a year to recover and finally called in an arborist a few weeks ago to give me his opinion on whether or not it could be saved.  What I thought were merely a few dead branches (albeit huge dead branches) were really the outward signs of the blight that took hold when the tree was weakened due to the unforgiving elements.  What was once a majestic tree....


suffered...


and now there is this:


I am so sad... (insert the sound of Taps playing in the background).

On the other hand (and a much brighter note), I made a card which fulfilled two SCS challenges - their last week's Sketch Challenge SC403, and this week's Color Challenge CC394.  So much fun.  These are not colors I'd normally put together (Sahara Sand, Not Quite Navy, Pacific Point), but that's the fun of a challenge - it makes you stretch outside of your comfort zone.  Here's the Sketch...


And here's my card:


I pieced strips of Pacific Point DSP Stack on self-adhesive paper, alternating each side, and then cut it out using the largest Apothecary Accents die, then "echoed" it using Not Quite Navy. Embossed the image on Whisper White then echoed it as well with NQN. The snowflakes are stamped with Tsukineko Glue Pad Adhesive and covered with blue glitter from Barbara Trombley. There is the barest hint of blue chalk under the kids, though I think I need to make it darker in the future. The ef is SU Northern Flurry placed at an angle then sponged with Shimmer Paint.  Like it?  :)

And now I am off to see a live baseball game with my darlin', DARLIN' DH.  Have a fab day and happy crafting!!

Shea

Monday, September 24, 2012

Christmas Candle

Hello!  

Today is my first day to submit a challenge to one of my favorite stamp companies, Flourishes LLC. 


 I LOVE their stamps as they are very detailed and fun to color, something which I am teaching myself to do using any variety of media, be it COPICS, watercolor pencils, ink and SU Blender Pens, etc.  Flourishes stamps are also romantic and evoke a warm feeling of home and garden, and who doesn't love that?  Not that I'm not exploring other stamp companies and will soon start entering their challenges and contests too, but Flourishes was the first mailorder company from whom I ordered first and I will always have a place for them in my heart and craft room.

But enough about that, on to the card.


It is a sketch challenge at Flourishes and a technique challenge at Splitcoaststampers, the technique being to create polka dots instead of cheating and using printed paper.  So I made my background paper by stamping it in three colors of ink (red, green and dark mustard) using a brand new pencil eraser.  Then I stamped over them with a faded script background stamp and embossed that in shiny gold ep, though you really can't tell how much it sparkles in the photo (must invest in a light box and better lamps).  On top of all that I sponged the edges with more dark mustard and also Vintage Photo Distress ink.  So guess what - I now have glitter in my two ink pads.  Isn't that nice.  And now I've learned to sponge BEFORE embossing because the gold embossing powder tends to come off a little bit.  Hope I don't mind glittery flecks in future projects!  

In keeping with the polka dot theme, I punched 1/8" red dots using a hole punch and glued them to the centers of the snowflakes on the green embossed panel.  Colored the image with Copics, watercolor pencils and a little chalk, popped it up on dimensionals and finished everything off with two ribbons and a pearl brad, plus a teensy bit of yellow glitter on the flame..  Oh, and a couple of layers of scallops under the green panel (though the sparkly gold one doesn't show up well).  

What do you think?   Another one to add to my Christmas stash - yay!!


Have a lovely day and happy crafting!


Sunday, September 23, 2012

Day One

I am excited.  

Today is the first day, Day One if you will, of my new blog.  I never thought I'd have a blog.  Blogs were something other people did, people who made things or had something to share.  Not me, I have a regular, ordinary life as a SAHW and do my thing, crafting, taking care of a husband, traveling on occasion, but not much else.  I retired from a hectic, fast-paced job at an investment bank one year ago (almost to the day!) and have enjoyed playing with my toys ever since.  My DH and DD are delighted.  I have a lot of "toys": knitting needles, gardening tools, fabric, and sewing/embroidery machine, etc.  So that was the plan, to take life easy.  DH was happy - no more stressed out wife who tried to cram her activities into the weekends.  DD was happy - more time with her mom during the week.  (She's 24 but loves to come and hang out with her best bud, ME!)  The hectic holidays came and went, and then shortly after Christmas, I discovered the art and fun of making cards.

It's all my DD's fault, actually.  She made beautiful, 12x12 mixed media journals for me, my mother and my DH for Christmas, and after everything holiday-related had subsided, I decided to try my hand at making a card.  Nothing big and glamorous like her journal pages, just a card.  How hard could it be, I asked myself.  A little glitter, a little glue, some paper.  Easy peasy.  "Just throw on some embellishments," said DD.  So I did.  "No need to measure or plan, just place at your whim and whimsy."  So I did.

And this is what I wound up with (hold the laughter to a dull roar, please).


 And somehow, instinctively, I knew I should do something with the inside (what was left of it, that is). 


 Bless my heart.  I didn't know any better.

So, being terribly unsatisfied and knowing this wasn't the look I was going for, I tried another.

OK, this was better.  It looked more finished on top.  Wasn't sure how I was going to mail it with those big plastic hearts on it if I even WAS going to mail it (um, not a chance), and I used a black Sharpie to edge around the hand cut (unmeasured) centerpiece, but yeah, this was it.  I'd made a real card!  And I've been hooked ever since.  

Fast forward to today, 8 months later, and I have learned so much.  No lessons, no classes, no crops, no friends who craft, just me, magazines, and the internet.  Thank God for the internet.  It fuels my need to learn and allows me to shop for many of the supplies I can't find in local craft stores.  I'm happier with my finished products but am constantly trying to learn more and more.  Why, I'm not sure, but the desire to create in most of us is strong, and so is the desire to share.  And hence, my blog, where I will share my creations, not just of paper but also of plants, fabrics, mosaics and anything else that strikes my fancy.  This is the adventure.  I am so excited.

Welcome.


BTW, here is a more recent card.  The rose was painted with varying strengths of coffee.  Good old Folger's instant.

Happy crafting!!