Followers

Click on photos to enlarge.

Showing posts with label Fiskars Make a Wish Quotes. Show all posts

Saturday, March 2, 2013

Birthday Rosette - Challenge Day at A Gem of a Challenge

Hello!

It's time for this week's challenge over at A Gem of a Challenge, and the theme this week (Challenge #69) is "Button It."  This challenge will run from 8:00 AM March 2 to 6:00 PM March 8, and the prize for the winner will be 2 individual digi images (NOT SETS) from Pink Gem Designs.  So do head on over and see what the rest of the lovely Design Team have created, then join us, won't you?  We'd love to see you!


Today's card was, for me, a quickie in that there was no coloring or over-the-top frills.  Sometimes I like to keep things a little simple, maybe a little more graphic, and there was a pack of dp I wanted to use in the worst way that required something less frilly and frou frou.


That's not to say there isn't a little bling on it, as in the four gold-toned buttons on opposing corners, and the red rhinestone on the actual birth date.

I've made it smaller than my usual 5 1/2" square, this time being 4 1/2".  The stamp is the Happy Cake Day Calendar stamp, which you can find here.  You can use it already colored or not.  I chose not as I wanted to keep it light and bright, given all the rich color behind it.  I made a fairly large rosette so as to lift and highlight the stamp.  I love rosettes.  They're deceptively easy to make, but they're so versatile and useful.

I filled in the month by hand, but of course I left the year empty.  Of course.  

The buttons were fun to choose as I had recently bought the cutest little parmesan cheese shaker filled to the brim with brass and gold buttons and I was finally able to use it today!  I bought this at an antiques shop with my daughter the day after Thanksgiving, and it was a steal.


Pretty cool, huh?


A couple more buttons...

Even though they don't jump right out at you, they add a nice note of depth and dimension to the card, and just the teeniest bit of glam.


I fully support the inside sentiment.  Of course.  (As if we need an excuse to eat more cake.)

So that's it for me today.  Thank you for taking the time to join me, and here's wishing you a lovely Saturday.  Please do head on over to A Gem of a Challenge to check out the latest adventure and see what the lovely DT has in store for you.

Happy crafting!

Supplies:

Stamp: Happy Cake Day Calendar (PGD),Make a Wish Quotes (Fiskars)
Ink: printer
Paper: Very Vanilla, Real Red, Basic Black (SU); Serenade (Bo Bunny)
Extras: Dies: Dienamics Circle Stax; Simply Scored scoring tool (SU); vintage buttons, red rhinestone.

Challenges entered:

Simon Says Stamp and Show - Unused (or brand new) stamp
The Pink Elephant TPE#188 - Anything Goes
Creative Card Crew #30 - Birthday
Simon Says...Anything Goes
Divas by Design - Anything Goes
Crafts and Me #122 - Dies or Punches
Inky Impressions #99 - Splash of Red
Quick Quotes Friday Challenge #25 - Rosettes/Medallions
Creative Inspirations - Anything Goes

Friday Sketch Challenge - #38


Saturday, December 8, 2012

Brayered Birthday

Hello and good morning!

Got just a quick post for you today.  I'll be working in the craft room later on but am also cooking for a lunch I will be attending tomorrow, plus I'm making my "famous" (among friends and family) homemade lemon curd which is so delicious I rarely eat it ON anything because it's so good I'd rather eat it right off the spoon.  Do you ever do that?  I do it with really good hot fudge sauce, too.  No excuses, I just like my lemon curd (and hot fudge) "neat."  I'm comfortable with my vices.  Ha! 

Today's very simple card is the first card I brayered where I was happy with the results.  


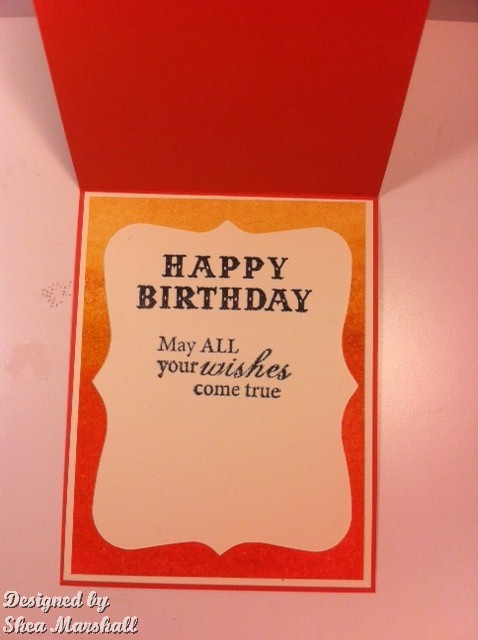
I'm a little neurotic about brayer lines on my cards, so I will keep after it repeatedly until I get the results I like, which I did with this card.  I do pound the daylights out of the inked brayer to get those pesky lines to blend.  I used three colors of ink (listed below), starting with the lightest first, then ran the paper through the Big Shot using the SU Top Note die.  I stamped it with the sentiment then adhered it to the black layer off which I had rounded the corners first.  I added a couple of flourish die cuts, heat embossed the sentiment, then added a seam binding "messy" bow and an antique brad (SU), and the card was finished.  Simple, but effective.


I'm showing you the inside today to show you what you can do with the negative piece left over from cutting out the Top Note die, or any other die.  Rather than throw that "window" piece away, use it to frame your inside greeting!  It's already the same color as the front piece, which ties it to the card nicely and adds continuity.

Now if only the stamper could stamp straight. 

That's all for today, but I'll be back tomorrow!  Thank you so much for joining me today, and have a lovely Saturday!

Happy crafting!

Ingredients:

Stamps: Fiskars Make A Wish Quotes
Ink: Memento Tuxedo Black; SU Pumpkin Pie, More Mustard, Daffodil Delight, Versamark
Paper: Pumpkin Pie, Very Vanilla
Accessories: Brayer, seam binding, SU Antique Brads, Dienamics Fancy Flourish die, black embossing powder, heat tool